
Assembly made easy!
The three mounting variants at a glance
Mounting directly on the wall/ceiling - Mounting on substructure - Mounting with adhesive
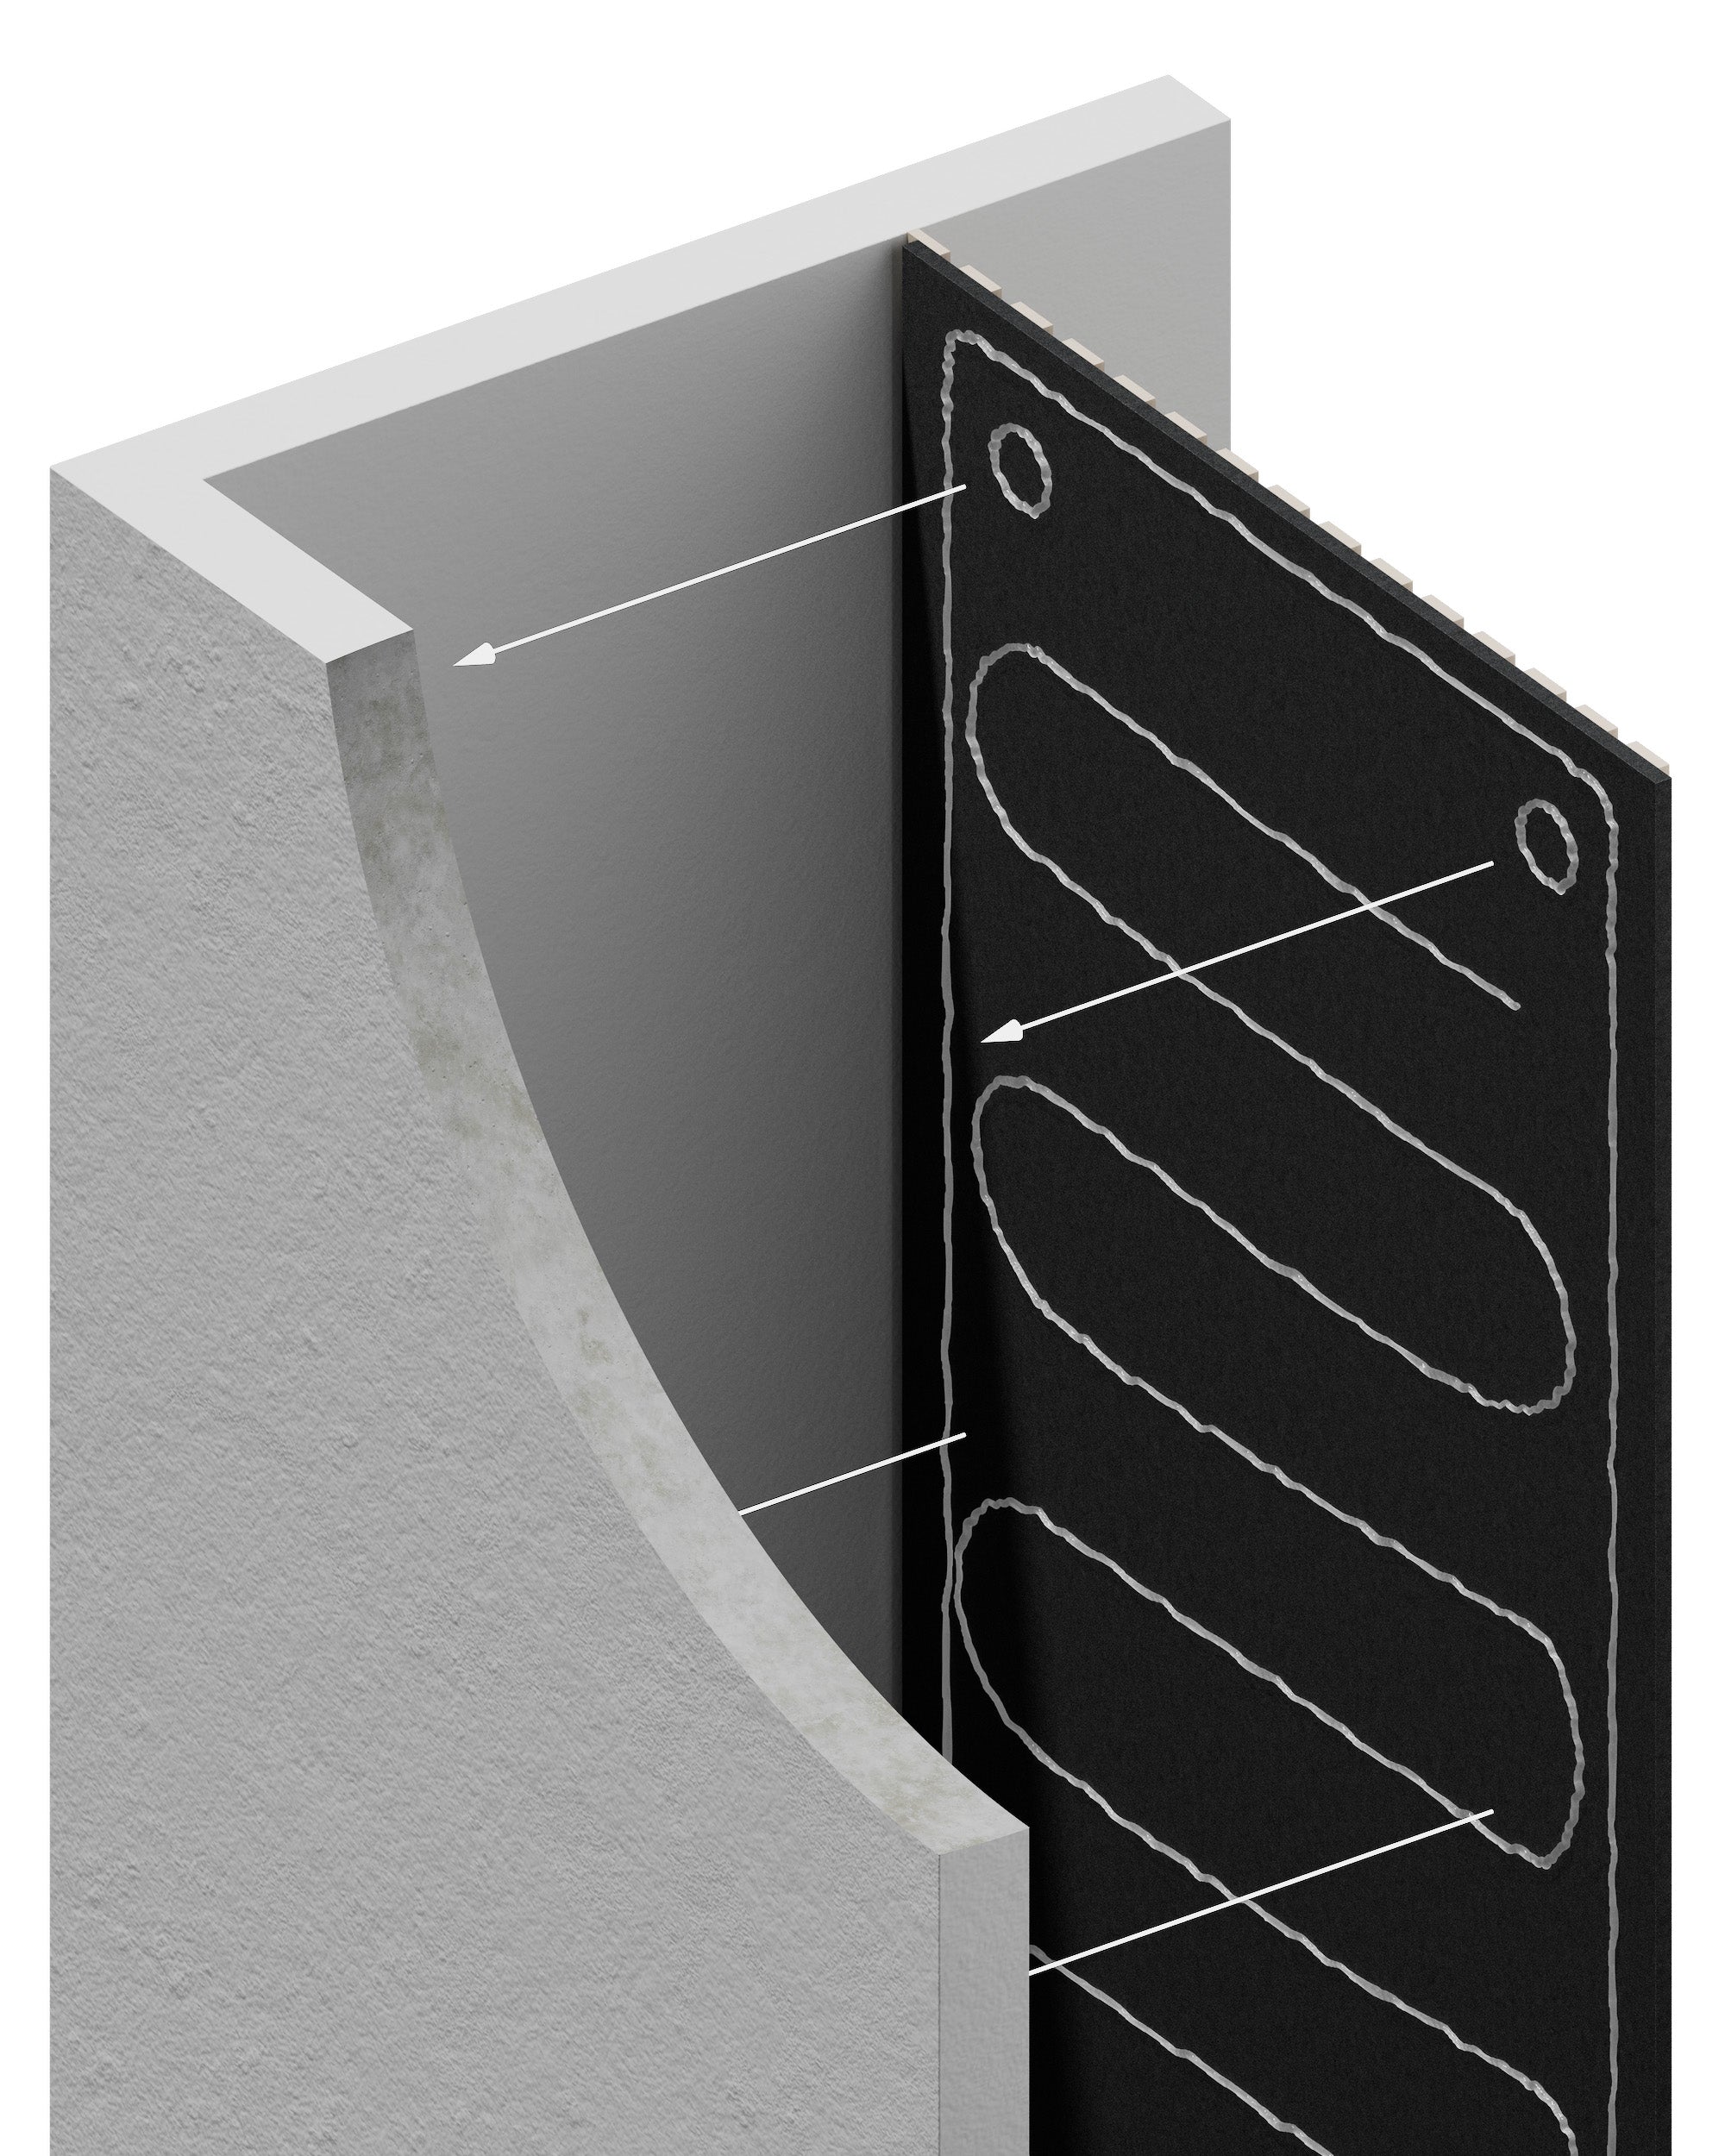
To achieve sound absorption class D,
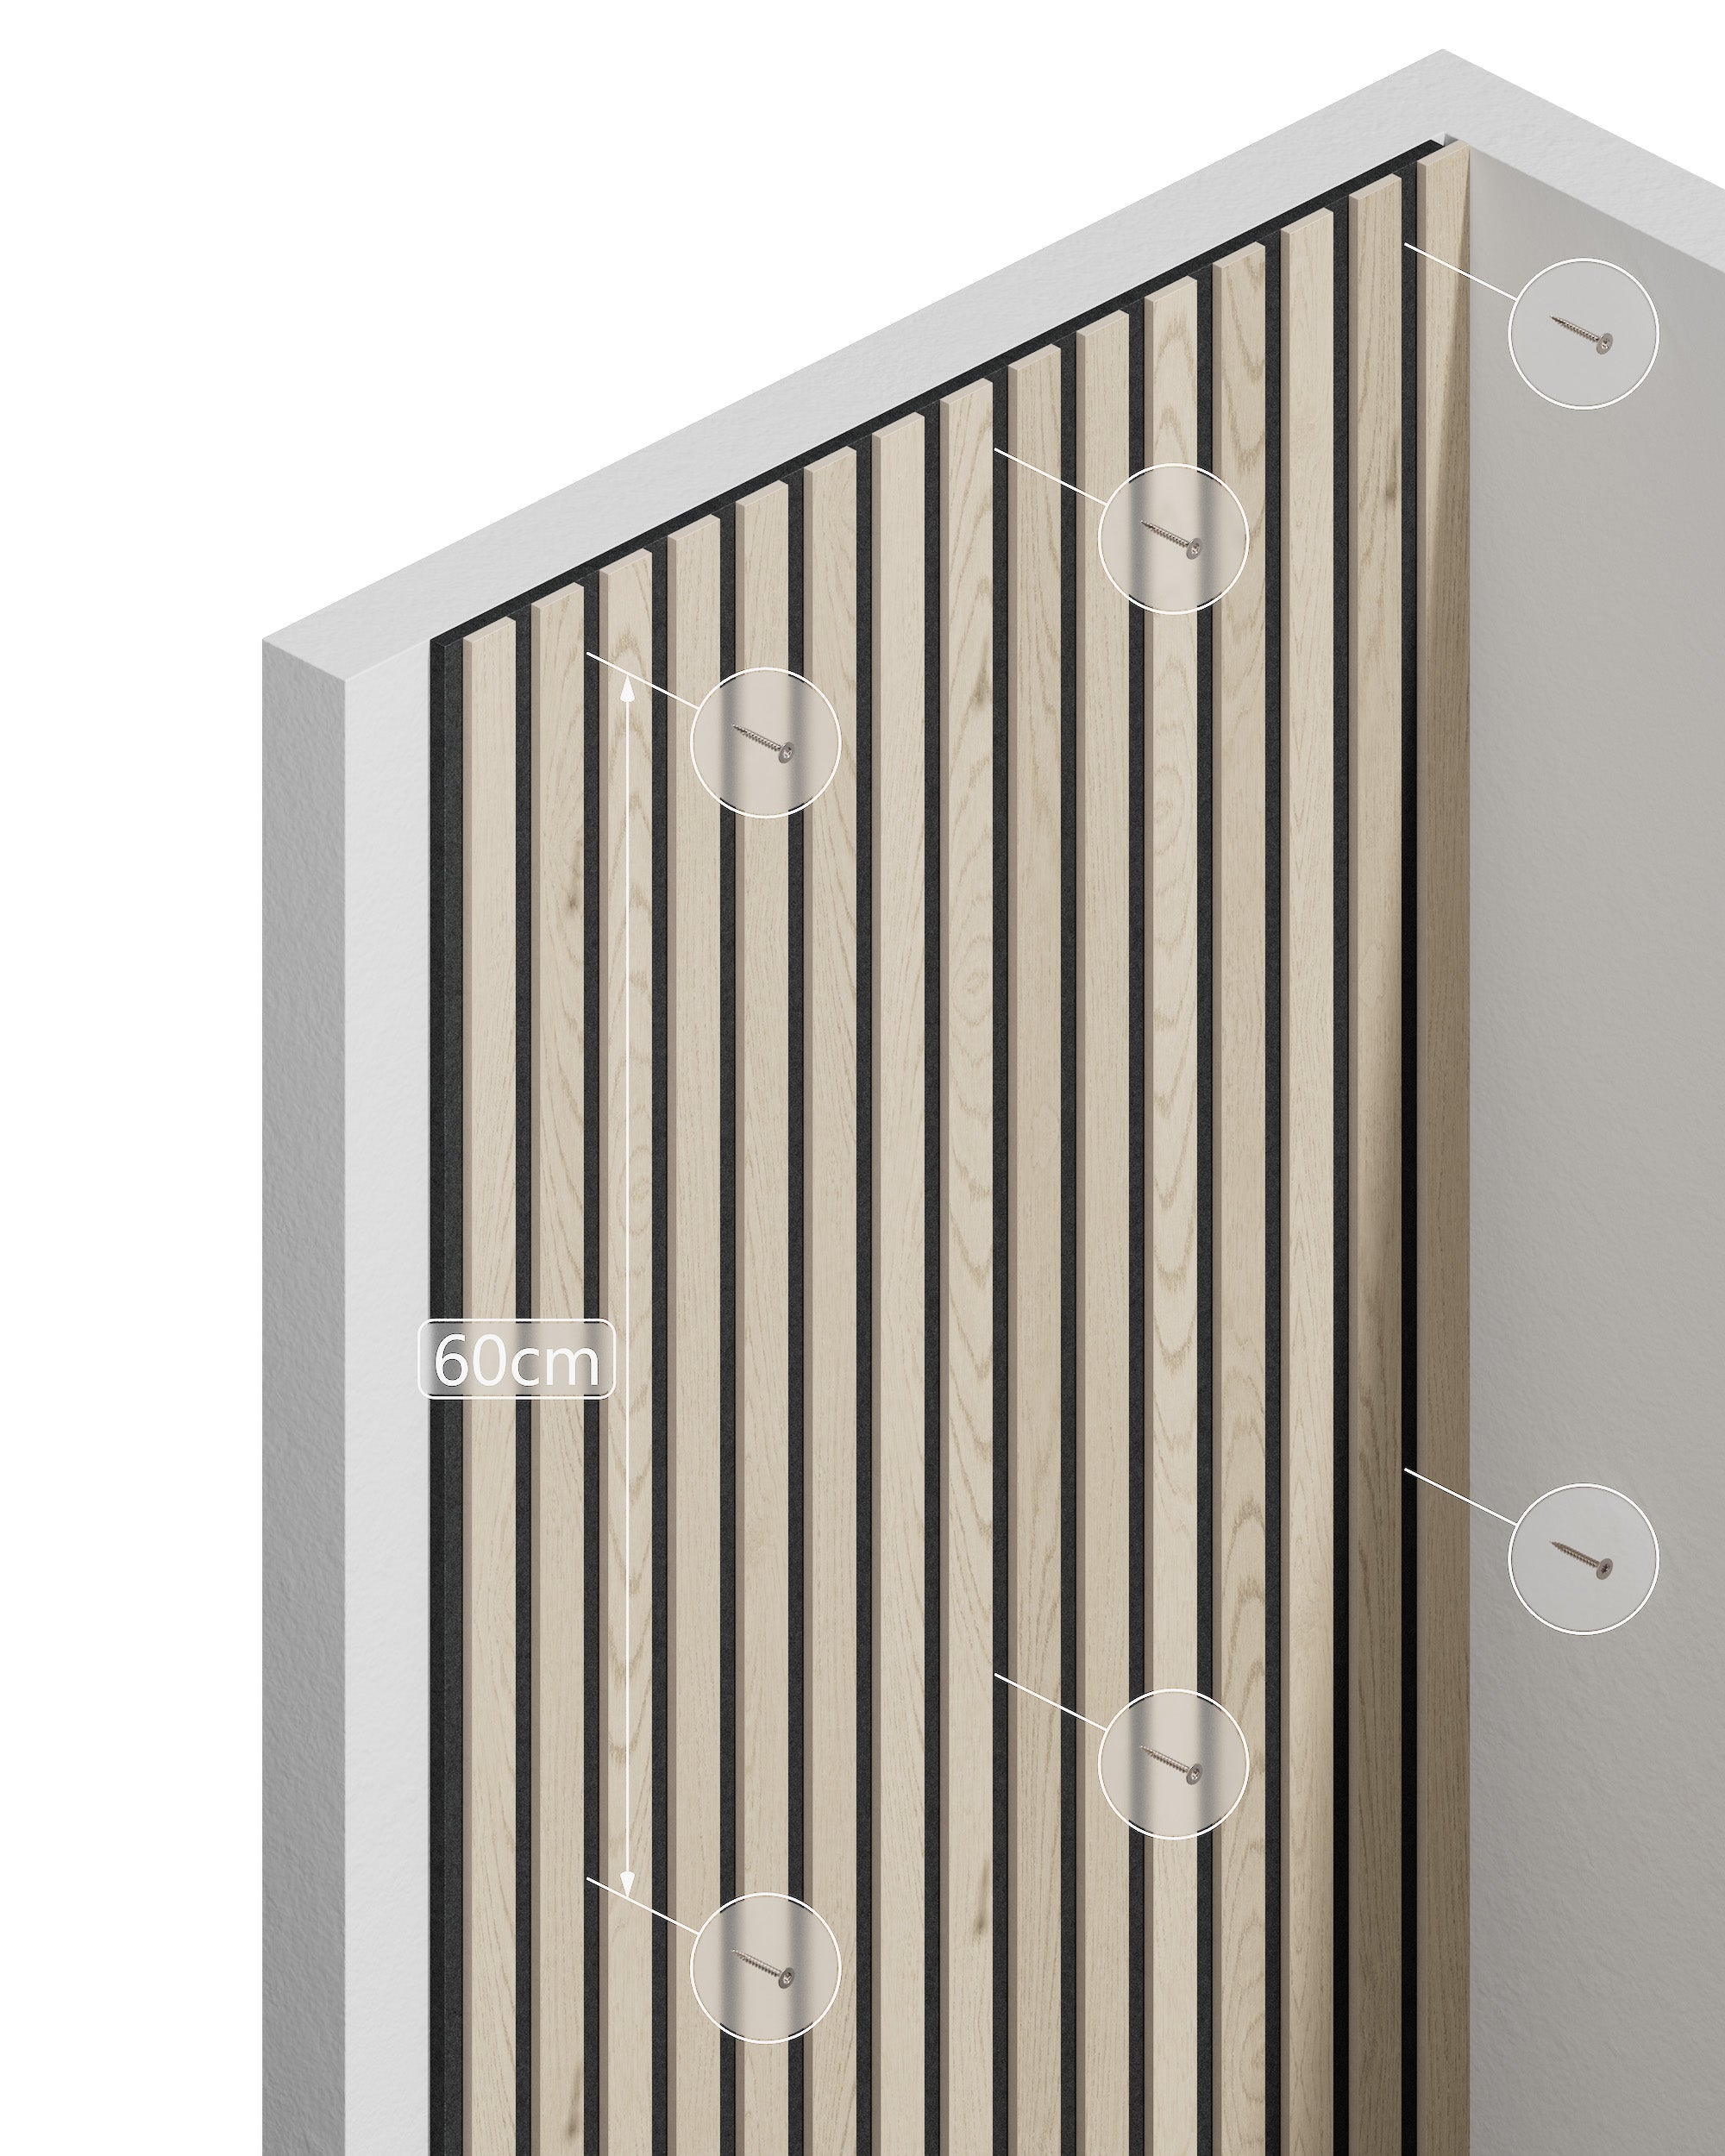
The acoustic panel is mounted directly on the wall or ceiling by using a
Suitable screws in the correct colour for the surface against the felt for
concealed fastening.
When installing panels in 240cm we recommend:
- 15 screws for wall mounting
- 30 screws for ceiling mounting
When installing panels in 300cm we recommend:
- 18 screws for wall mounting
- 36 screws for ceiling mounting
Assembly checklist:
- Circular saw, jigsaw, hacksaw, Japanese saw or similar with a fine cut
- spirit level
- Cordless screwdriver
- Cutter knife (to cut the felt if necessary)
- tape measure
- Acoustic screws
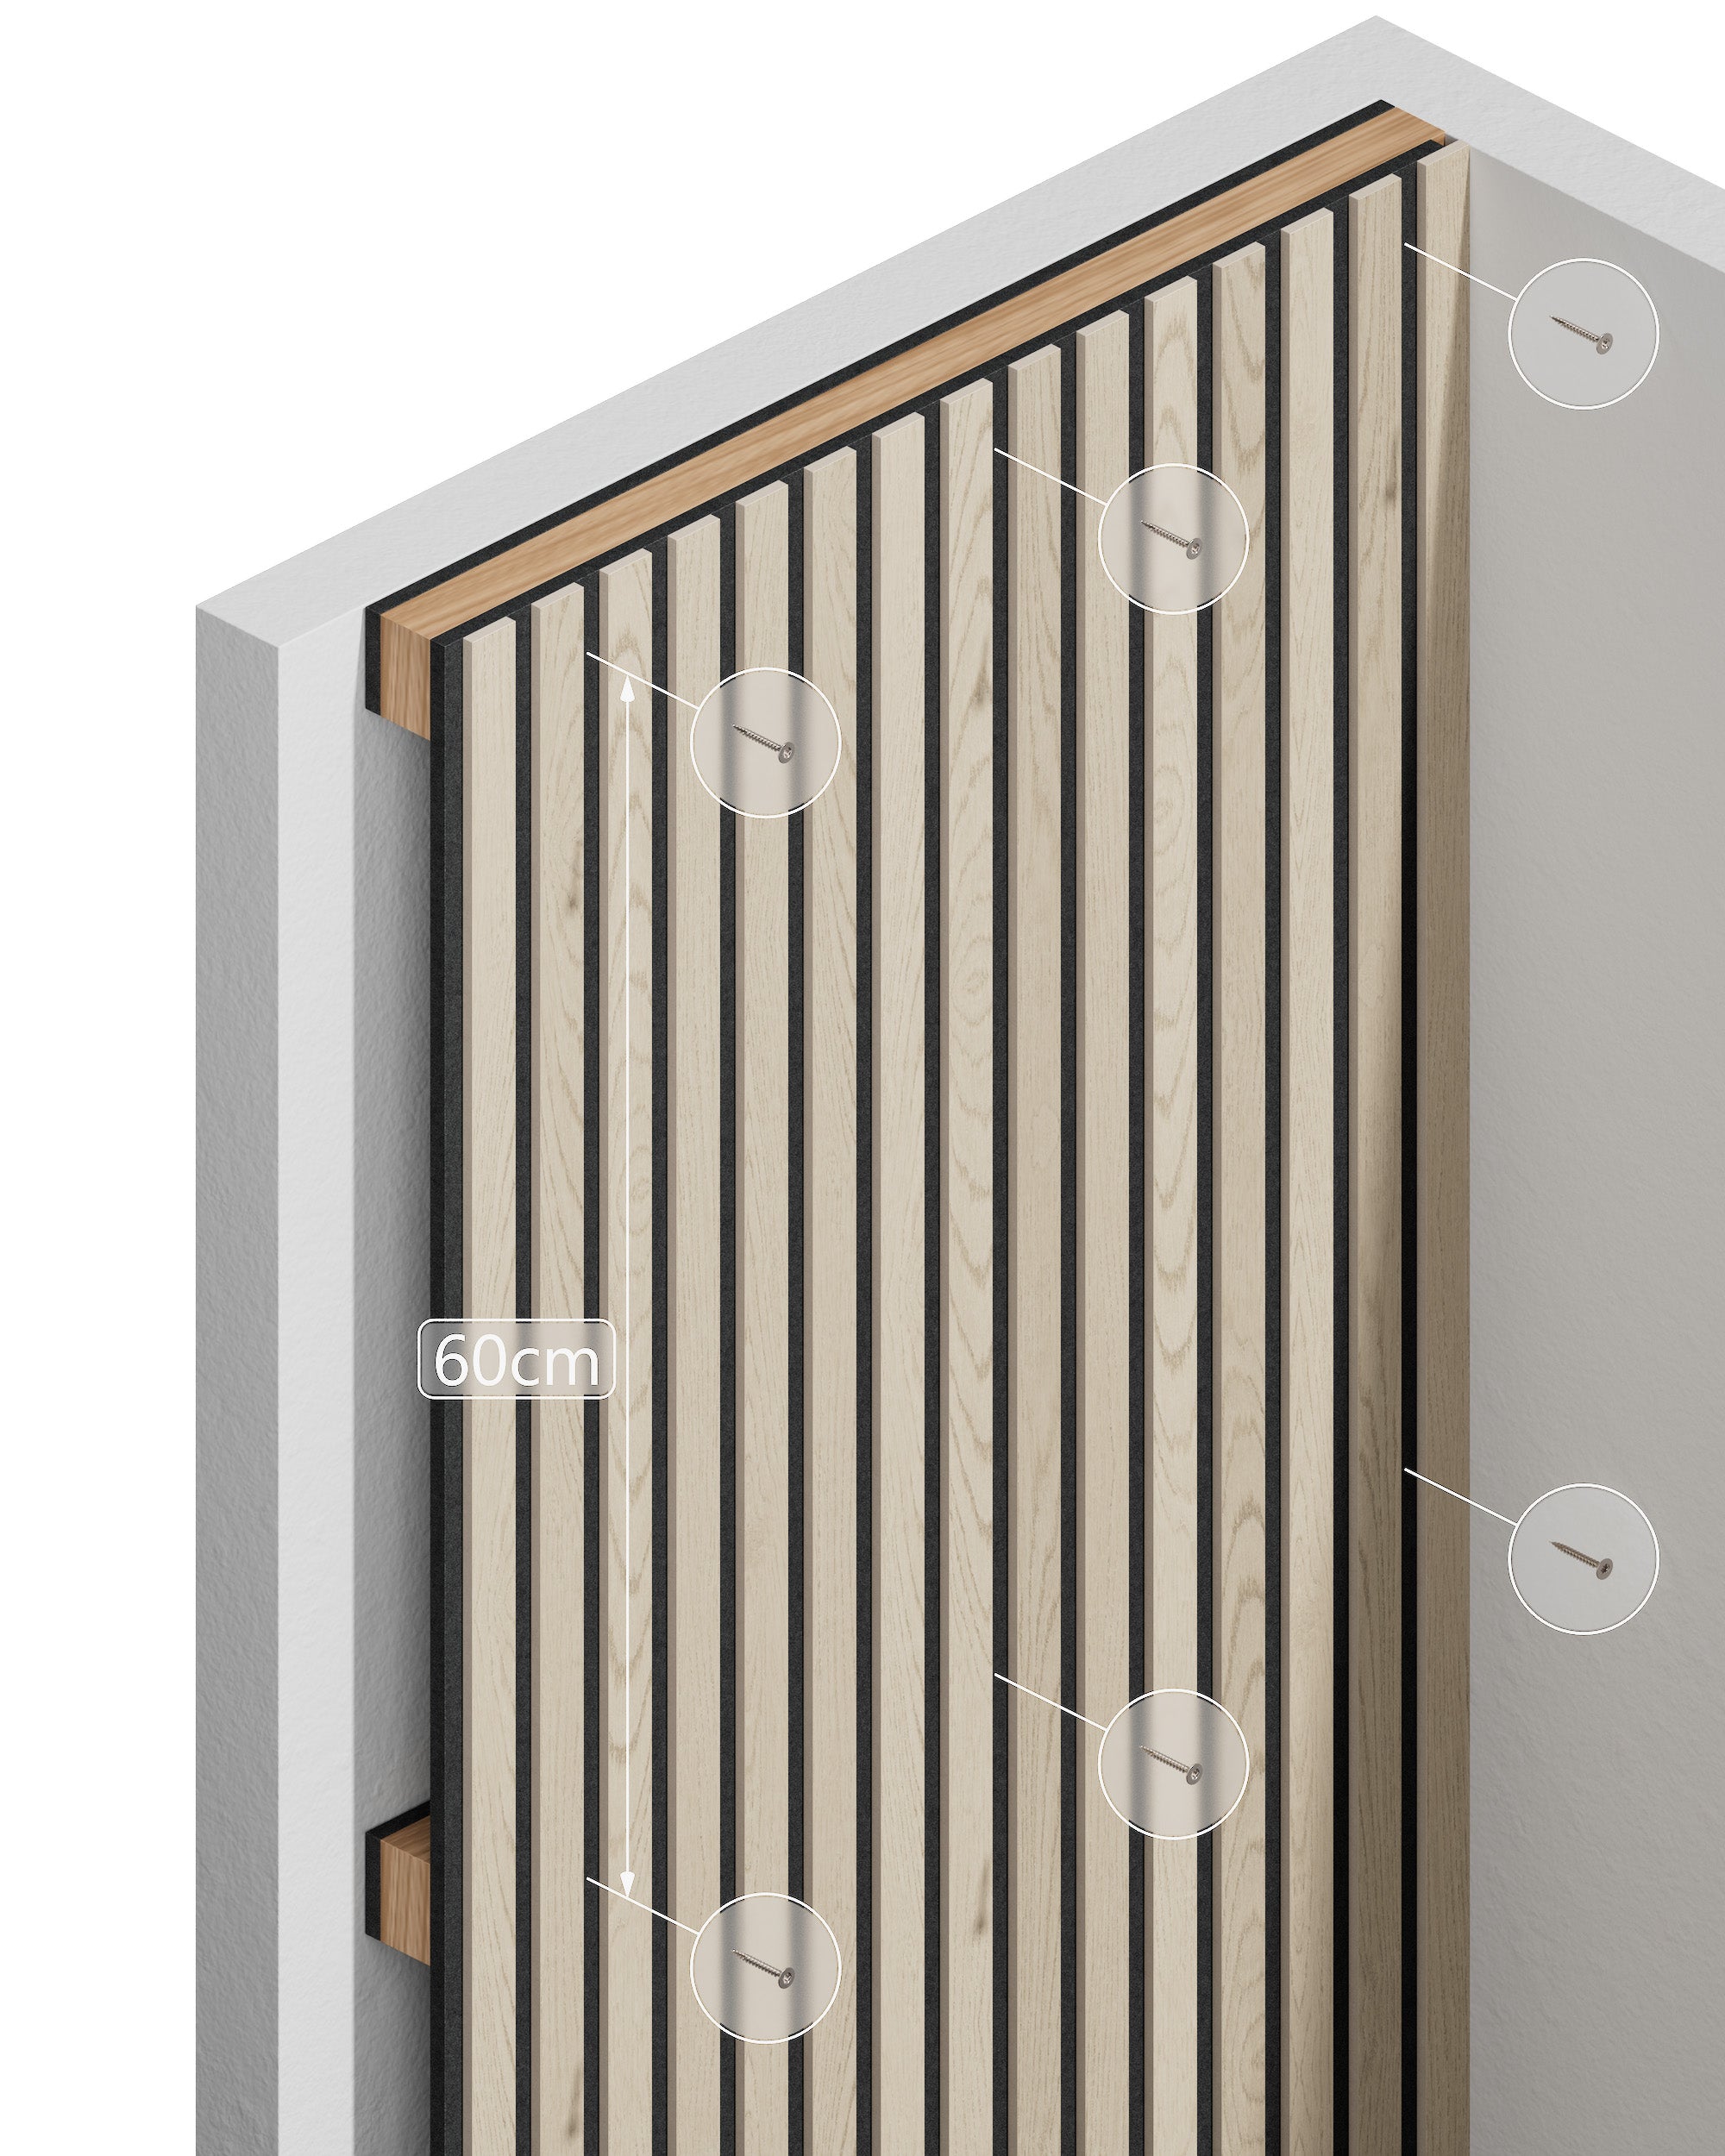
To achieve sound absorption class A (best absorption class), the acoustic panels must be mounted on 45 mm thick joists with 45 mm thick insulation behind the panels. The joists
are installed at a distance of 60 cm cc on the wall and 30 cm cc on the ceiling.
When installing panels in 240cm we recommend:
- 15 screws for wall mounting
- 30 screws for ceiling mounting
When installing panels in 300cm we recommend:
- 18 screws for wall mounting
- 36 screws for ceiling mounting
Assembly checklist:
- Circular saw, jigsaw, hacksaw, Japanese saw or similar with a fine cut
- spirit level
- Cordless screwdriver
- Cutter knife (to cut the felt if necessary)
- tape measure
- Acoustic screws
Acoustic panels can also be glued directly to the wall using a quick-drying adhesive. We recommend applying a thick layer of adhesive to ensure durability. Caution! Always follow the instructions on the adhesive. This installation method is suitable for wall mounting only.
Attention : Panels in our Trendig series must be screwed.
Assembly checklist:
- Circular saw, jigsaw, hacksaw, Japanese saw or similar with a fine cut
- spirit level
- Cutter knife (to cut the felt if necessary)
- tape measure
- Suitable adhesive
To achieve sound absorption class D,
The acoustic panel is mounted directly on the wall or ceiling by using a
Suitable screws in the correct colour for the surface against the felt for
concealed fastening.
When installing panels in 240cm we recommend:
- 15 screws for wall mounting
- 30 screws for ceiling mounting
When installing panels in 300cm we recommend:
- 18 screws for wall mounting
- 36 screws for ceiling mounting
Assembly checklist:
- Circular saw, jigsaw, hacksaw, Japanese saw or similar with a fine cut
- spirit level
- Cordless screwdriver
- Cutter knife (to cut the felt if necessary)
- tape measure
- Acoustic screws
To achieve sound absorption class A (best absorption class), the acoustic panels must be mounted on 45 mm thick joists with 45 mm thick insulation behind the panels. The joists
are installed at a distance of 60 cm cc on the wall and 30 cm cc on the ceiling.
When installing panels in 240cm we recommend:
- 15 screws for wall mounting
- 30 screws for ceiling mounting
When installing panels in 300cm we recommend:
- 18 screws for wall mounting
- 36 screws for ceiling mounting
Assembly checklist:
- Circular saw, jigsaw, hacksaw, Japanese saw or similar with a fine cut
- spirit level
- Cordless screwdriver
- Cutter knife (to cut the felt if necessary)
- tape measure
- Acoustic screws
Acoustic panels can also be glued directly to the wall using a quick-drying adhesive. We recommend applying a thick layer of adhesive to ensure durability. Caution! Always follow the instructions on the adhesive. This installation method is suitable for wall mounting only.
Attention : Panels in our Trendig series must be screwed.
Assembly checklist:
- Circular saw, jigsaw, hacksaw, Japanese saw or similar with a fine cut
- spirit level
- Cutter knife (to cut the felt if necessary)
- tape measure
- Suitable adhesive

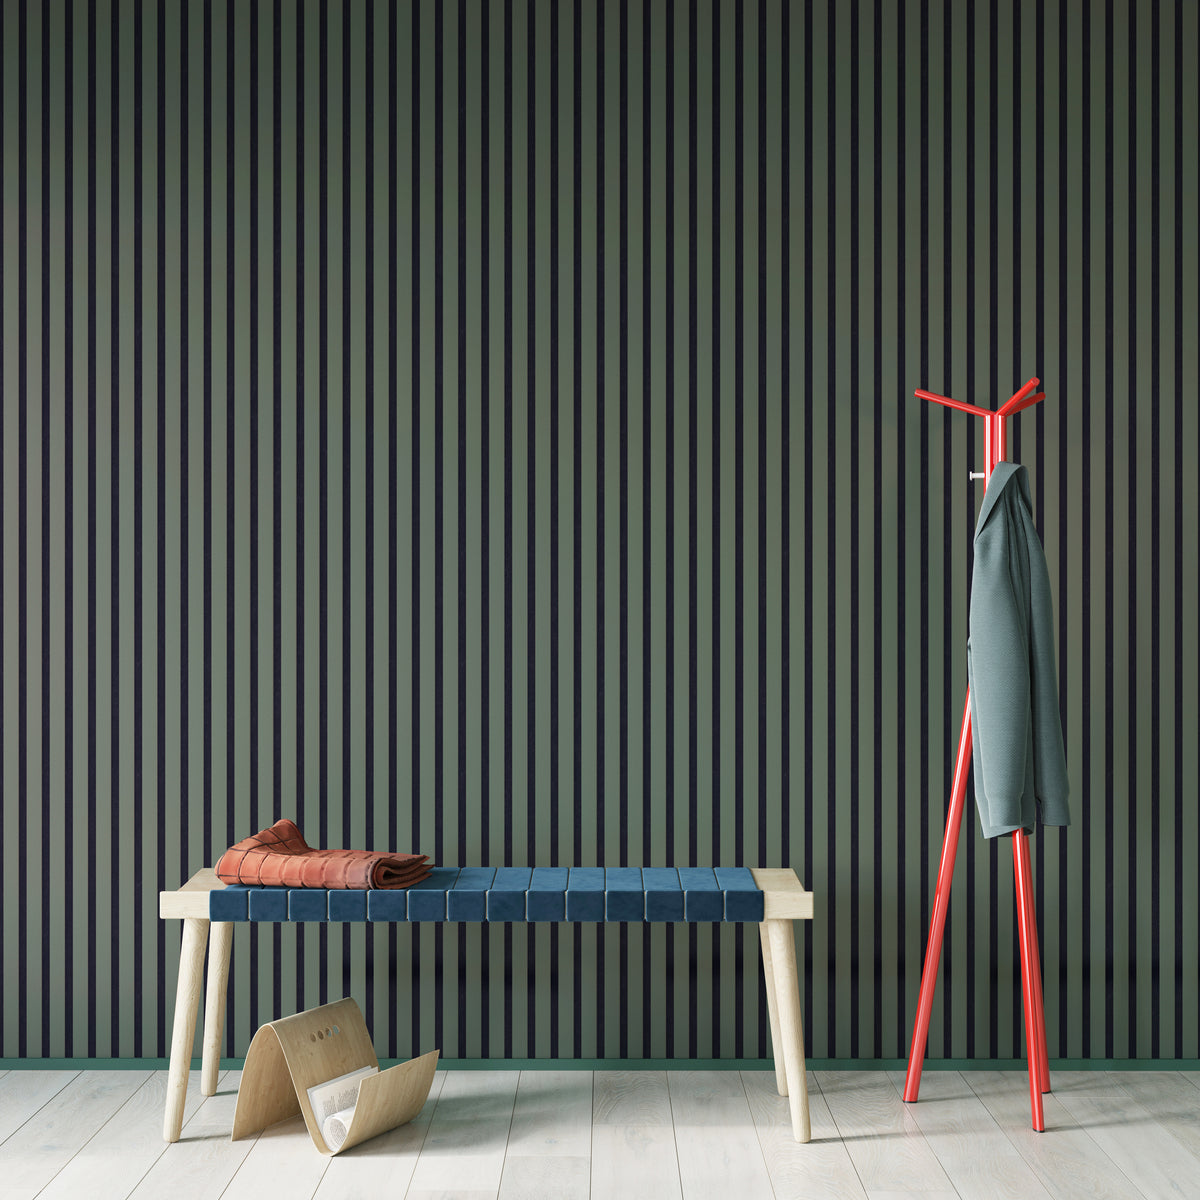
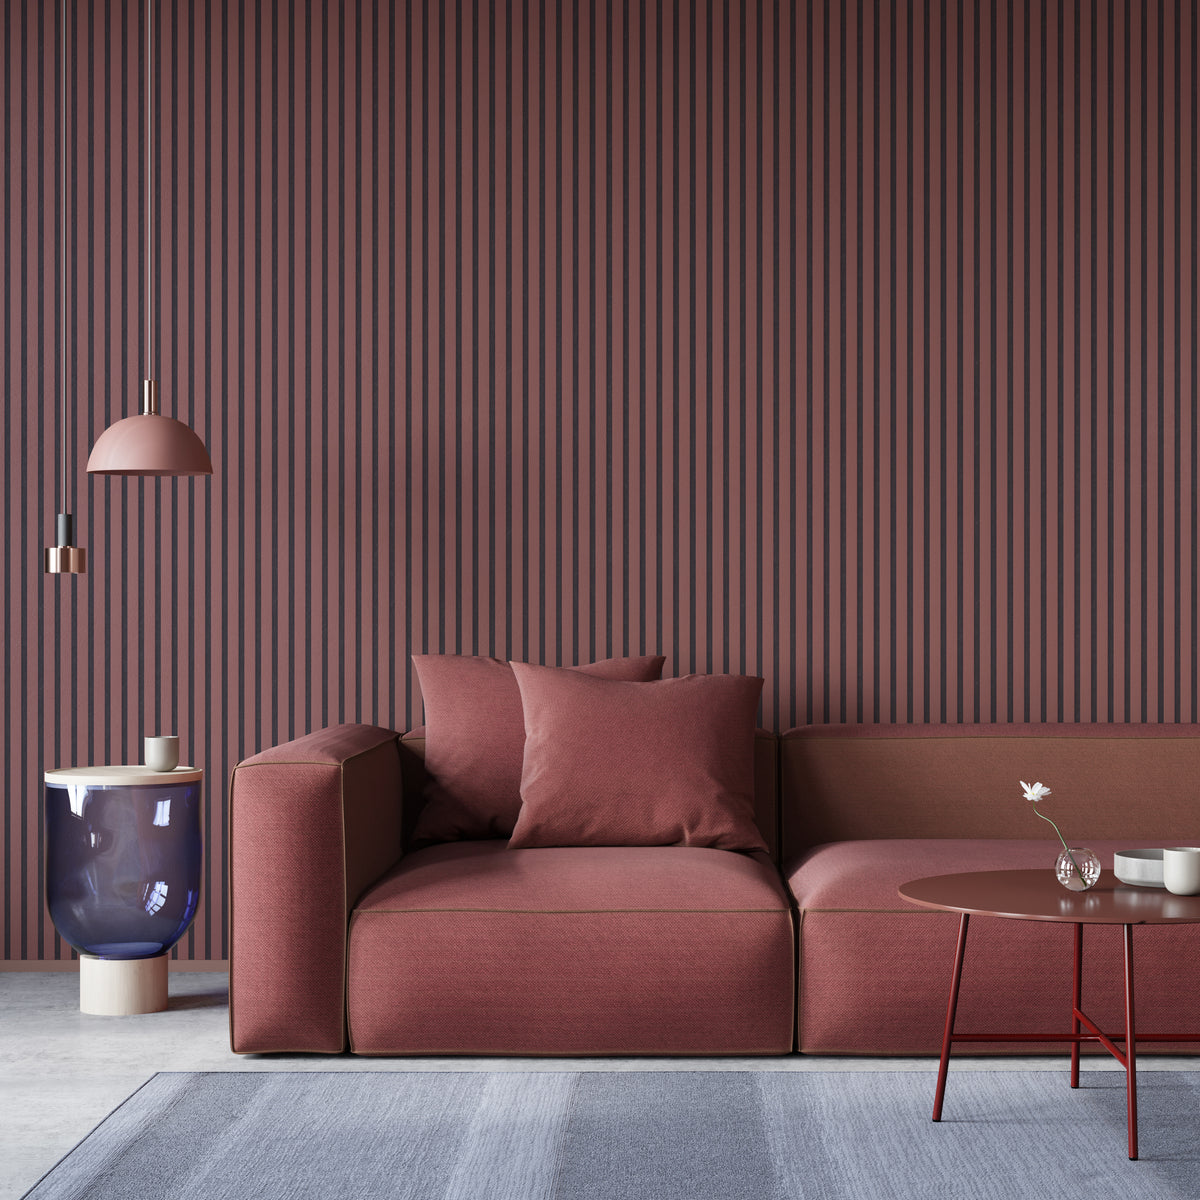
"We'd think about acoustics sooner next time!"
BodyKiss X Momento Acoustic
Anne and Daniel from BodyKiss built a beautiful home, but initially didn't consider the acoustics at all. As a result, they could barely hold a conversation! With our acoustic panels, they not only brought Scandinavian design into their home, but also created a much quieter and more comfortable soundscape.